Crappie, Fishing Business, Tips and Tricks
How To Make A High Quality Crappie Jig
Feb
Please note that some of my articles contain pictures of the products that I write about. By clicking on them you will be redirected to my affiliate links where you can purchase the reviewed product. I typically get a small commission off any purchases which helps keep my site growing!
Making Your Own Jigs Can Be Fun And Rewarding!
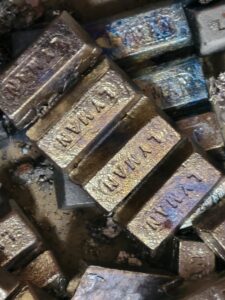
I’ve been making my own crappie jigs since I was a preteenager. With little more than a hot pot, some scrap lead and a jig mold, I created hundreds of sixteenth- and thirty-second-ounce jig heads and received the satisfaction of catching fish on my own creations.
My first jigs weren’t the prettiest things ever as I was new to the experience!
It wasn’t long afterwards, I started experimenting with feathers, chenille, and nail polish to make some awful looking jigs that belonged in a museum instead of a lake.
The Expenses When Making Your Own Jig
Making your own jigs can actually save you money over the course of a long fishing career. As it stands in 2022, a ten pack of Good Quality painted jig heads will run you between four and eight dollars.
Factors that determine the quality of a jig head are:
- Lead Purity
- Mold Quality
- Hook Size
- Paint Job
- Additional Features
*If fishing on a budget, you can skimp in certain areas to cut variable costs. I will go more into detail later.
What You’ll Need To Make A Basic Jig Head
- A Liquid Metal
- Hook
- Mold Cavity
Additional Options:
- Paint (Powder/Latex)
- Eyes
- Weed Guards If Applicable
Ok, now that we have an idea of what’s needed let’s dive into each one in a little more depth.
Liquid Metal-
Jigs can be made out of any metal realistically but there are only a couple practical options. Even if you’re a millionaire and wanted a gold jig, reaching gold’s melting point, you’ll have surpassed your mold cavity’s melting point thus destroying the jig and producing a “bad mold cast”.
Lead
is currently the metal of choice when making homemade jigs due to its density, low melting point, and relatively cheap cost.
Avoid using junkyard lead if possible as it is mixed with impurities that will cause weight differentials and much of the metal will render useless as it collects at the top of your heating pot. It can also lead to more miscasts with each pour!
Though it makes up the majority of jig heads, today lead has been given a second look. Toxicity from thousands of lead jigs in each body of water is a growing concern. So much so that some states have outlawed small quantities and going so far as preventing the mailing of lead in small jigs.
Tin/Bismuth
is an alloy (combination of metals) in a certain ratio taking advantage of each metal’s properties that make it a stronger jig. This particular metal combo is nontoxic and gaining market share slowly.
The major disadvantages to using tin and bismuth alloy is the cost, and the fact that the density is still inferior to lead. If you were to use an eighth ounce cavity the actual casted jig head will likely only weigh a little over a sixteenth of an ounce!
Heating Your Metal For Pouring Jigs
Your fishing lure production can be scaled as high as you want it, but if you’re still in the beginning phase than a HotPot will work just fine. These devices use electric current to build and store heat inside a small cast iron ladle which reaches past leads melting point of 622 degrees. 

The handle stays cool to the touch but please take caution anytime working around hot lead. It can cause serious injuries…or worse if you’re not extremely cautious!
Choosing The Right Hooks For Jig Making
If you think there are a lot of fishing lures on the market, just take a glance at how many style and sized hooks there are to choose from!! Fortunately, in the beginning all you have to do is choose your mold and it should tell you which hooks work with each design so we will cover that next.
Choosing The Right Mold
Ok, now that you’ve picked your metal, you’ll need a mold to “cast” into…
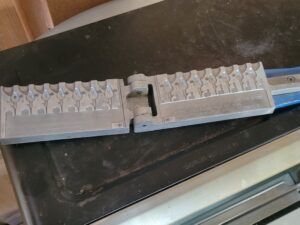
For beginners you really can’t go wrong with a small closeable mold from a reputable company like DoIt. They make hundreds of molds for just about any common jig design. Most run under a hundred dollars too!
Once your metal is warm enough you will place your hooks inside the crevices which you’ll be able to see before closing the mold. Once it’s closed you can pour your metal in all the way up to the top filling in the air gaps. Failure to do so could cause a miscast, and you’ll have to start over!
Sometimes if your mold is cold, you will start out with miscasts. If that’s the case, you’ll need to pour several casts without hooks in them to heat the mold up. After you open the mold allow them to fall out, use a pair of pliers and place them back in the HotPot so they can remelt.
Great News! You Have Your Homemade Jigs, But Now What?
It’s time to add paint, eyes, or anything else that you want to your jig!
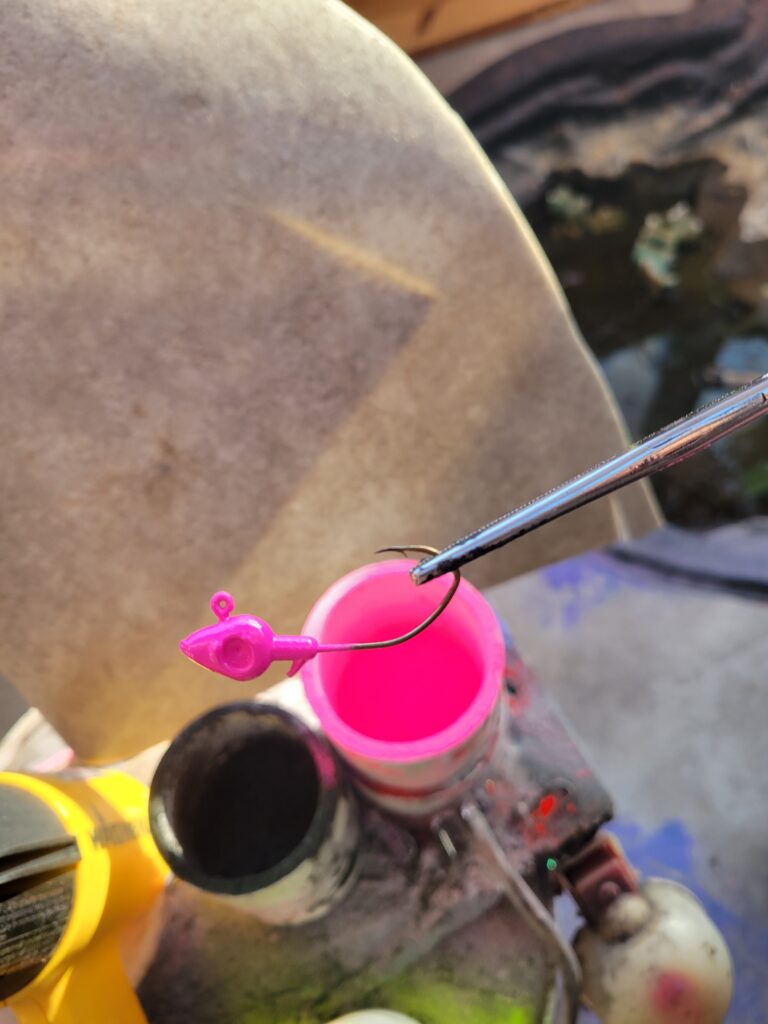
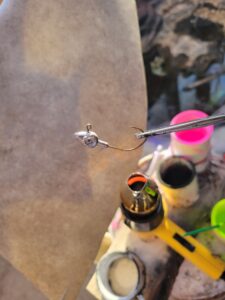
Powder Painting Crappie Jigs
is my preferred method when it comes to getting that perfect color combo down. Powder paint works when you take your homemade jig head and apply heat to it. I try to heat my jig head to no more than four hundred and fifty degrees via a heat gun as pictured above. Now I don’t have a thermometer to check each one, I’ve just poured and painted enough by now to know when the jig is ready to be dipped into the powder paint, so you’ll have to experiment some until you get it down!
The powder paint will bond with the heated jig head and begin to melt causing it to coat it in your color of choice. If the paint job comes out gritty then you didn’t reach enough heat. Simply put the jig back over the heat source and re-dip the bait into the paint.
*Tip For Perfect Powder Painting Your Homemade Jig Heads*
Anglers who paint a large amount of jig heads use what is known as a “Fluid Bed”. It’s really a nice term to describe some PVC Pipe fittings and an air hose but does it ever make our lives easier!

The idea is for the air to get in under the paint causing it to bubble up into almost a moving cloud hovering in the air. This keeps the powder paint from clumping up into large pieces thus creating a nice even smooth paint finish
Fluid Beds are easily made but I like buying them off of Ebay or other sites.
Making A Two-Tone Powder Paint Homemade Crappie Jig Head
Some folks like to stop at just one-color jig but it’s not for me!
To get our splatter effect on the tops of our jigs we simply dip a small fresh dry paint brush into a different colored paint and while the jig is still hot from the base color use a flick of the finger causing the secondary color to rain down on top of the jig.
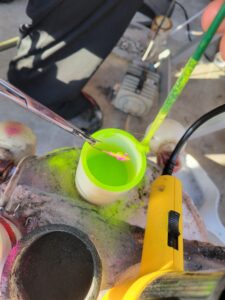
In most instances the paint will bond and blend in, but if you waited too long just reheat the top of the jig causing the new paint to bond. After you’ve reached your preferred color combo drop the jig into an old cup of cool water to flash cure it.
We enjoy using many different color combos referring to our base color first and then our splatter color. If I report that I caught them on a pink and chartreuse jig, then you know the base color was pink while the splatter was chartreuse (Hint Hint a great color combo!)
My favorite powder paint is by Protec. They seem to offer the most colors and they jive well with a fluid bed.
Vinyl Paint Can Be Used As Well!
If you’re using Tin/Bismuth to pour your jigs, then powder painting is almost impossible. The alloy melts at a much lower temperature so you’ll either not get the right paint to bond if it’s too low of heat, or you’ll actually melt the jig head from your heat source if it’s too hot.
Vinyl paint is the solution! We don’t use it in our lineup just yet but don’t think for a second that it’s an inferior product. Many companies still use it to excellent results!
Since we don’t use vinyl paint, I won’t cover it in detail as I’m sure there are much better experts in that field to call upon!
Curing Your Homemade Painted Jig Heads
By now you should have created a new fish catching machine but before we test it out there is one more step if you want to get the absolute most out of your homemade jig head. You’ve got to cure it one more time!
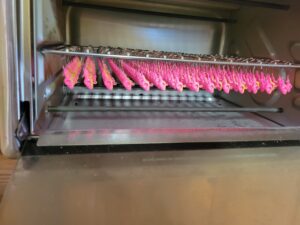
If you’d like to actually see how important this step is sometime then take two freshly painted jigs and drop one of them on the concrete. Chances are you’re going to see chips in the paint once you pick it up.
Now if you took the other jig and cured it one last time, you’ll need a metal file to scrape down to the underlying lead! Here’s how we do it…
Find a cheap toaster oven at a local yard sale or one from your house that will no longer be used for food. You will line your jigs up on the rack and then sat the heat for around 420 degrees and let them bake for about 20 minutes.
As mentioned before the jigs now have a rock-hard finish that will last you dozens of trips!
Adding The Finishing Touches To Your Homemade Crappie Jig Heads
Of course, they’re ready to fish with now, and of course you can catch fish on them but for me, it’s time to add the eyes to our homemade jigs! I honestly do think that eyes on a jig do help you catch more fish over the long haul!

We add two different styles of eyes depending on the jig size. on our one eighth ounce series we use a “wiggle eye” or “googly eye” which not only provides a 3-d profile but a livelier jig as the eyes move up and down with each jigging motion.
Our one sixteenth ounce jig heads use a waterproof stick-on eye which adds more life to the that series.
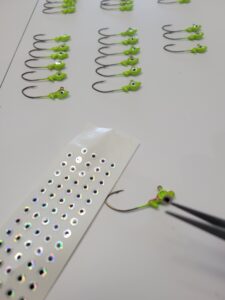
You can always get as creative as you’d like!
Conclusion
I’ve only begun to scratch the surface on how to create your own custom crappie jig heads. The profiles, colors, and accessories are infinite and there are no wrong ways to design a jig. If you’d like to start with the jig itself and then design a jig head for it, check out my article on the 8 best crappie jigs on the market!
We here at the store will start with the idea. We will then design it the old fashion way with a sculpting clay.
Once the design is to our liking, we cure it, then send it off to have a production mold made.
If you’d like to talk to us about purchasing our painted jig heads which at the time of this writing are so new, they’ve only been beta tested in select stores. With the results being very positive so far, we anticipate on having them on the site soon and hopefully in a store near you!